Monday 26 September 2016

You can't use the domain because it's not an accepted domain for your organization

After the Office 365 migration. There are some Users Mailbox converted from regular mailbox to shared mailbox and when we wanted to assign "Send As" user rights to a user. These error prompt out You can't use the domain because it's not an accepted domain for your organization.

This will not happen if we create a shared mailbox on the cloud. 


After some research and it was happen when the local domain @mydomain.local in the Office 365 User Email Address. you could try to search the email address.

1. Office 365 Admin Portal > Group > Shared Mailbox > Search and click on the User Name > Email aliases.

2. Office 365 Admin Portal > Admin Centers > Exchange > recipients > shared > Double click on the shared mailbox > Email Address.


In my Scenario I have an Active Directory, Azure AD connect and a demoted Exchange Server 2007. Since my Exchange 2007 server not working but i will show you the location in the Exchange server 2007 console. 


Delete User Email address using ADDS.

1. Go to your AD Server > Active Directory Users and Computers > View > Select Advanced Features > Navigate to the User Account > Right click and select Properties > Attribute Editor.


2. Search for proxyAddressess > Double Click and remove @mydomain.com address > OK


3. Go to  Azure AD Server > Open Powershell > Perform a Delta sync from Azure AD Connect.


4. Go to Office 365 Admin Portal > Admin Centers > Exchange > recipients > shared > Double click on the shared mailbox > Email Address.

The Email Address should be remove and you can try to proceed to assign "Send As" user rights.


Delete User Email address using Exchange Management Console (2007)

1. Open Exchange Management console > Recipient Configuration

Before migration = Mailbox > Right click user's mailbox > Properties
After migration & Mail Enabled User = Mail Contact > Right click User's name > Properties


2. Go to E-mail Addresses > Remove address with @mydomail.local


3. Go to  Azure AD Server > Open Powershell > Perform a Delta sync from Azure AD Connect.


4. Go to Office 365 Admin Portal > Admin Centers > Exchange > recipients > shared > Double click on the shared mailbox > Email Address.

The Email Address should be remove and you can try to proceed to assign "Send As" user rights.


Delete User Email address using ADSI Edit

* If you run MMC on client PC. You need to install RSAT to connect into the domain contoller


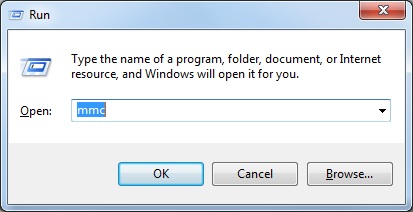
1. Open Run and type mmc 


2. Go to File > Add / Remove Snap-in 


3. Select ADSI Edit > Add > OK


4. Right Click ADSI > Connect to


5. Connect to Domain Controller by using Computer name or IP address


6. Navigate to the User Account > Right click and select Properties


7. Search for proxyAddressess > Double Click 


8. Select the object @mydomain.local > Remove > OK


9. Go to  Azure AD Server > Open Powershell > Perform a Delta sync from Azure AD Connect.


10. Go to Office 365 Admin Portal > Admin Centers > Exchange > recipients > shared > Double click on the shared mailbox > Email Address.

The Email Address should be remove and you can try to proceed to assign "Send As" user rights.


Saturday 2 July 2016

Increase Size of a Virtual Hard Drive (.vhd)

If you have Virtual Machine running on Windows Server 2003. To increase the vhd disk size you need a third party tool to expand the partition. This tutorial will explain to you step by step how to increase the disk space of a Virtual Machine.

I'm Using a Windows 10 Hyper-V and running a windows server 2003 R2 virtual machine.


1. From Hyper-V Manager, Right Click on the virtual machine and select Settings. Make sure the virtual machine is Off and do not have any Checkpoints.


2. Click on Hard Drive and click Edit


3. Select Choose Action > Expand > Next


4. At Configure Disk. Change the New size and then click Finish


5. Boot up the Virtual Machine and go to Disk Management. The extended disk space will show as Unallocated.


6. There have few items you have to ready before we proceed to increase the disk space

  • ExtPart - Dell Basic Disk Expansion
  • Winrar - Compression tool


7. Download the ExtPart. Create a new folder and name it ExtPart. Compress to C:\Extpart


**Remark - It will have error during the extending disk space for x64 machine if you only run through the Self-Extractor. 


8. Open Command Prompt and type cd\extpart > Enter > extpart c: [disk size in MB]


** Remark - If you found that the error " Unable to connect to c: or it does not exist" there have some workaround you may try. 

a. Make sure there are no checkspoints
b. Stop Services for Windows Search
c. Stop Services for Indexing Service
d. Stop File Replication service
e. Stop DFS Replication service
f.  Stop Logical Disk Management services


9. To extend disk space to the Virtual Machine. the number of disk space to be add will be below or more.

  • 1 x 1024 = 1024
  • 2 x 1024 = 2048
  • 5 x 1024 = 5120
  • 10 x 1024 = 10240
** Remark - You can run ExtPart multiple times until you fill all the additional disk space you gave to the disk.


10. Go to Disk Management and check the disk space had extend to your Virtual Machine.

Tuesday 24 May 2016

Fix Windows 10 Disk usage 100%

I think some of you might felt that why your computer run very slow when you using Windows 10. Try to end task some back end programs but it seems not helping at all. Here was the way that i had tried and it works for me. 

#Windows 10
#100% Disk Usage
#Google Chrome

1. You can see at Task Manager the Disk usage is 100% and keep on like this.


2. Open Chrome and Click the Menu on your top right.


3. Scroll down and Click on the Show advanced setting.


4. Navigate to Privacy and untick the Use a prediction service to load Pages more quickly.

Before


After


5. Check your Task Manager again and you will see the Disk usage will reduce.

Tuesday 17 November 2015

External user using Skype for business Web App

1.    From the email send by the Presenter. Click on the Join Online Meeting.


2.  It will prompt out External Protocol Request. Click on the Launch Application


3.  A web page will come out and Click on Join Using Skype for Business Web App Instead


4.  Click on the Skype for Business Web App plug-in


5.   It will download the Plug in.


6.   Install the Plug-In.


7.   After the Plug-in Installed. Login to the Skype or business Web App
            a.      Login to Guest, type your name below if you do not have Office 365 account
            b.      Login to Sign in if you an Office 365 user if you are Office 365 user


8.    It will prompt Skype for Business Plug-in. Click on the Allow


9.   The Skype for Business Web Application will start execute.


10.   You will see the user if they login to the Skype for Business Online Meeting.


11.   Click on the Monitor icon and you will see the option for the meeting function.